
On this page
- Set up a low-risk practice space
- Use a few terms consistently
- Reef knot for a light bundle
- Bowline for a fixed loop
- Clove hitch for temporary positioning
- Round turn and two half hitches
- Check more than the knot
- Practise inspection as a separate skill
- A small repair example
- Before using a light cord attachment
- Questions people ask
- Sources
Four knots are enough to begin making useful choices about light cordage. The worthwhile skill is recognising the job, tying the intended knot and noticing when it loosens. Collecting a long list of knot names is less useful than being able to inspect a simple one the next morning.
This guide is exclusively for low-risk, non-life-support tasks at ground level: bundling a rolled mat, practising a light tarp tie or attaching a small pouch. It does not cover climbing, rescue anchors, lifting people or heavy objects, towing, vehicle loads, hammocks, animal restraint or anything whose failure could injure someone. Use purpose-designed equipment and qualified instruction for those activities.

Full image attribution
Square knot 3787.jpg — ClemRutter; CC BY-SA 4.0. Resized and converted to WebP; source: https://commons.wikimedia.org/wiki/File:Square_knot_3787.jpg
Set up a low-risk practice space
Use a short length of visible, easy-to-handle cord and a smooth fixed object at ground level. Practise somewhere dry and well lit. Keep loose loops away from children and pets, and do not put cord around a person's body to demonstrate a knot.
Pick cord that lets you see the crossings clearly. Very thin, stiff or slippery line makes early practice unnecessarily difficult. A knot learned in soft practice cord may behave differently in another material. Read the cord and equipment instructions before using a knot in an actual setup.
Check for cuts, fraying, melted areas or hard spots. Retire doubtful cord from useful tasks rather than assuming a clever knot restores it. Do not infer a safe working load from a product name or the diameter alone. This guide assigns no load ratings.
Use a few terms consistently
The working end is the end you move to make the knot. The standing part is the length leading away from the knot towards the rest of the cord. A bight is a folded section with the sides not crossed; a loop has a crossing. The Scout Adventures knot guide supplies diagrams for these terms.
To dress a knot is to arrange its turns neatly before tightening. Setting it means tightening the intended parts so the knot takes its working shape. Inspect the result after both steps. A loose tangle can resemble several knots until tension reveals which crossing was wrong.
| Knot | Low-risk use here | Main limitation to remember |
|---|---|---|
| Reef knot | Tying the two ends around a light bundle. | Not a general join for loaded ropes. |
| Bowline | Making a fixed loop for a light attachment. | Can loosen when repeatedly slack. |
| Clove hitch | Temporary positioning on a smooth post. | Can move or loosen as pull changes. |
| Round turn and two half hitches | Light cord tied around a suitable fixed object. | Still depends on material, object and careful checking. |
Reef knot for a light bundle
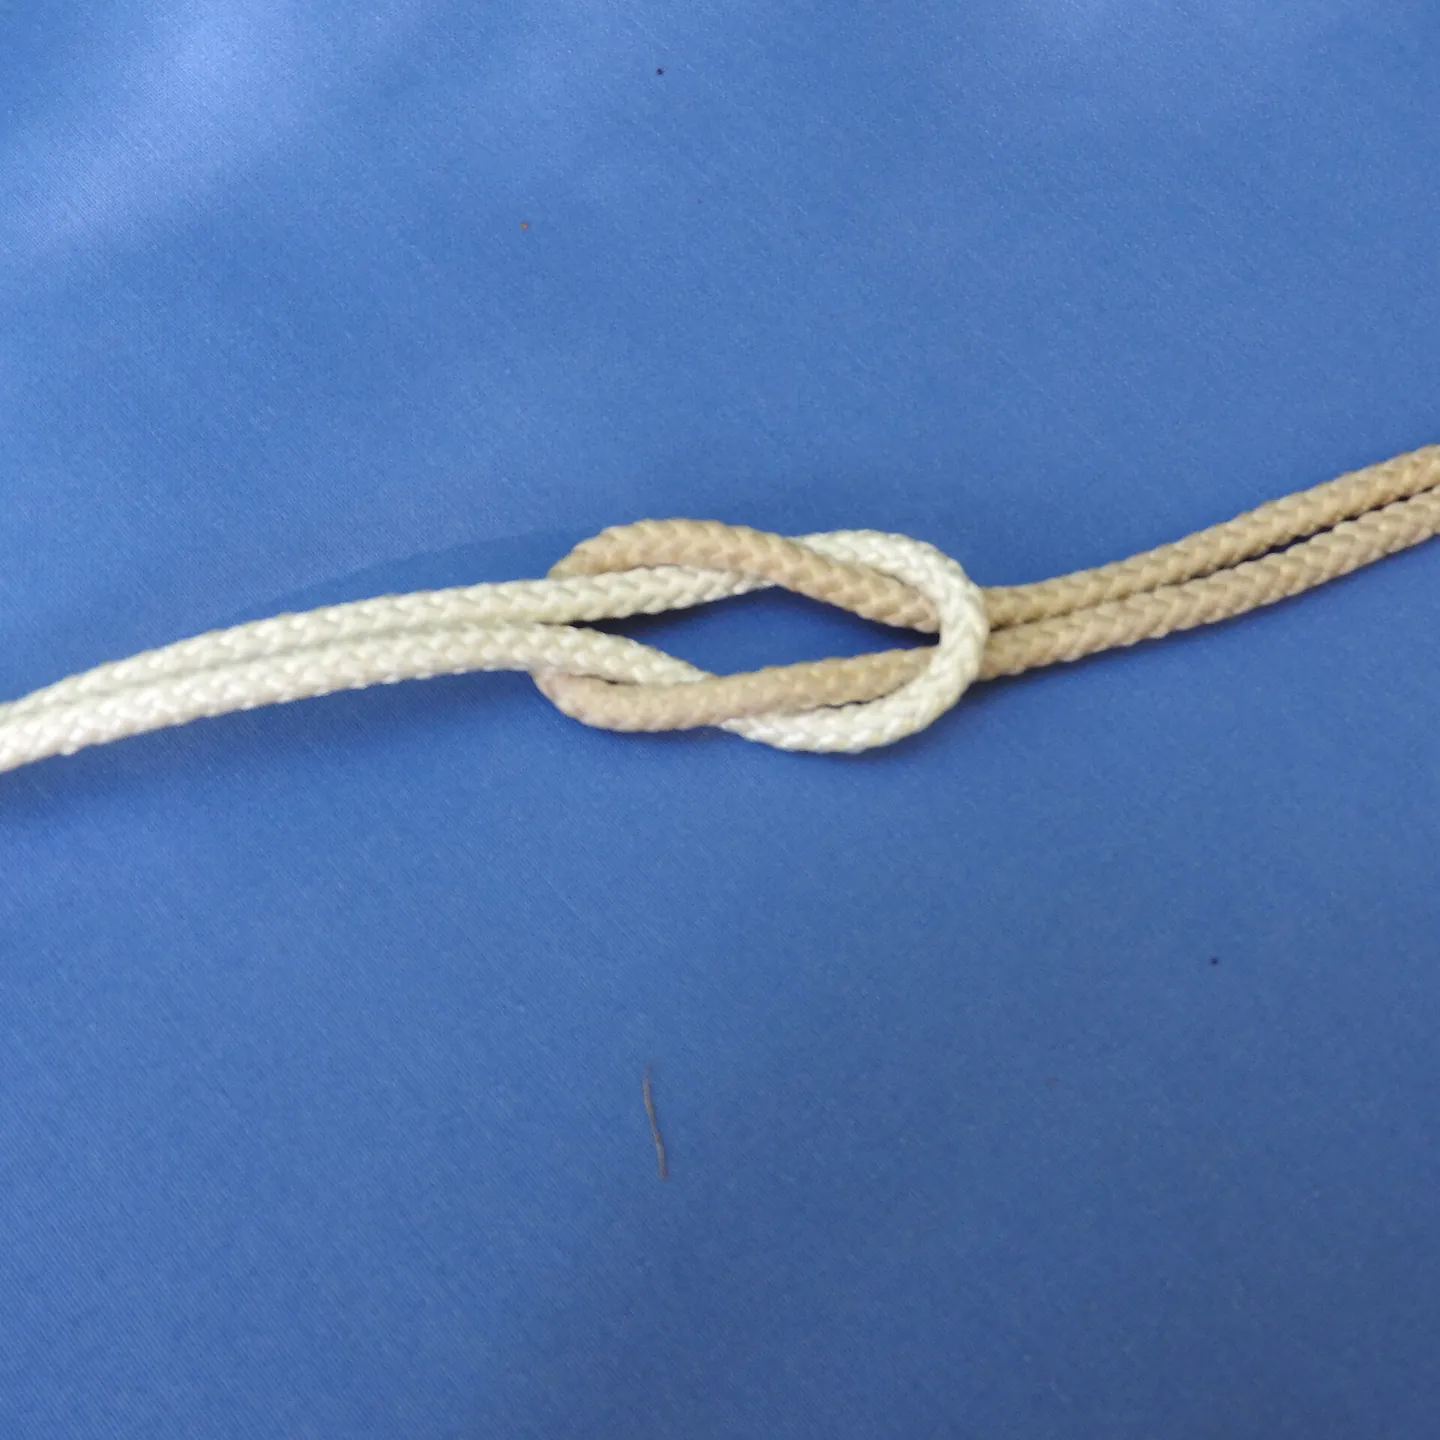
Start with the cord already around an unimportant light bundle, such as a rolled practice mat. Cross the right-hand end over the left and tuck it underneath. You now have the first half of the knot. Cross the end now on the left over the one on the right and tuck it underneath. Tighten evenly.
The finished knot should lie flat and balanced, with each loose end beside the standing part on the same side. If the two halves twist into an uneven shape, undo it and start again. Repeating the same crossing in both halves produces a different knot, so do not rely on tugging harder to correct an uncertain result.
Use this as a binding around the bundle, not as a way to extend two guylines. It can spill or loosen under unsuitable loading. Do not tie bundles above people, on a roof rack or where a dropped item could cause injury. The consequence of failure in this exercise should be a mat unrolling on the floor.
Bowline for a fixed loop
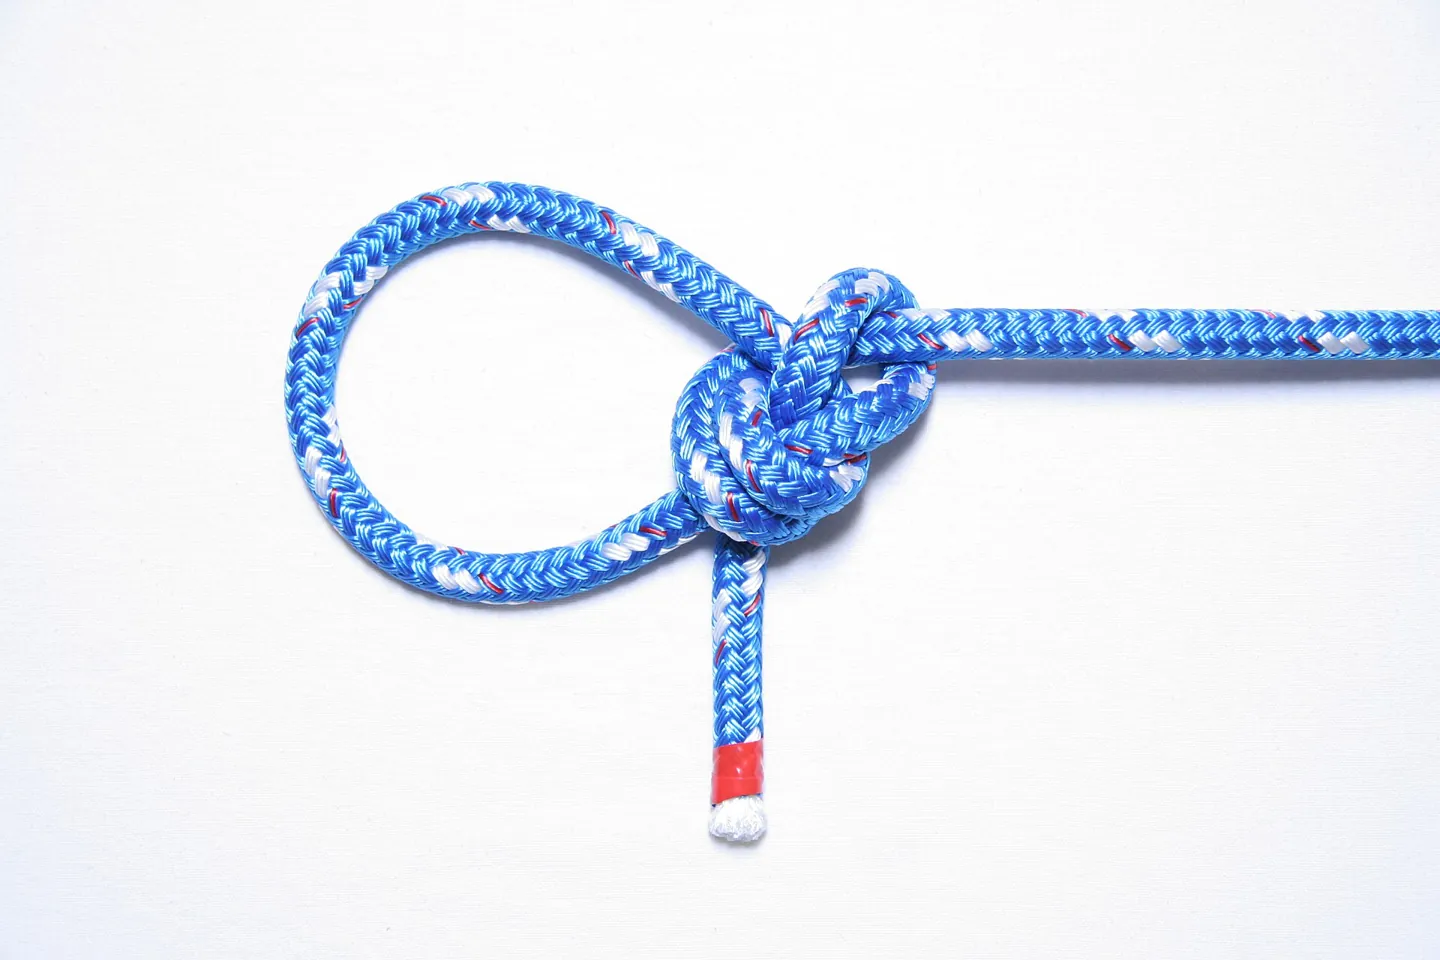
Follow the step-by-step bowline illustration while practising. Make a small loop, leaving enough working end for the larger attachment loop. Feed the end through the small loop as though starting an overhand knot. Lead it around the standing part and back through the small loop in the opposite direction. Dress and tighten it, keeping the larger loop at the intended size. Compare every crossing with the illustration before using this light attachment.
Use a diagram or demonstration to confirm the path before relying on your memory. The working end must go around the standing part, not merely around the edge of the small loop. Leave a generous visible tail rather than trimming it close to the knot. Check the finished form against a trusted illustration.
The Scouts explain that a bowline can loosen without tension. A fixed loop is not a guarantee of permanent security. For this guide, use it only on a light, non-critical attachment where you can watch what happens during repeated slackening and retightening.
A loop can also lift off an open-ended post, even when the knot itself is correct. Inspect the attachment point as well as the knot. Do not put the loop around a wrist, waist or neck, and never use this exercise as preparation for a rescue rig.

Full image attribution
Heringe.jpg — Jan Uthoff; CC BY 2.5. Resized and converted to WebP; source: https://commons.wikimedia.org/wiki/File:Heringe.jpg
Clove hitch for temporary positioning
Take the working end around the practice post. Cross over the standing part on the front of the post and go around again. Tuck the working end beneath its own diagonal section on the front, as shown in the clove hitch illustration. Draw the two ends to arrange the turns beside one another with that diagonal section holding them in place.
Look for two turns around the object and a diagonal crossing. Pull gently in the direction the line would actually take. Then release the tension and change the direction slightly. Observe how easily the hitch can shift on your particular cord and post. This is a useful lesson, not a strength test.
The Scout Adventures guide describes the clove hitch as less secure than a round turn with two half hitches. Treat it as a temporary positioning aid here. It is a poor choice when the line will repeatedly flap loose or when you cannot inspect it. Do not use an unfamiliar hitch merely because it is quick to tie.
Round turn and two half hitches
Pass the working end around the smooth practice post twice to make the round turn shown in the round turn and two half hitches illustration. Pass the working end around the standing part and through the loop it creates to make the first half hitch. Repeat in the same direction for the second half hitch.
Dress the two hitches neatly against one another and tighten gently. The turns around the post and the hitches around the standing part have different jobs. Check that you have actually included both half hitches rather than leaving a single loose tuck and assuming the extra cord around the post will compensate.
Practise with a light tarp corner on calm ground, using the equipment maker's suitable attachment points. Keep the tarp low, lightly tensioned and away from paths. Do not suspend heavy poles or create a structure people depend on for safety. Stop if the fabric, attachment or post moves unexpectedly.
Check more than the knot
A correctly tied knot can still be attached to a weak eyelet, rotten post or damaged cord. Work from the fabric outwards: inspect the attachment, cord, knot and fixed object. Ask what happens if any part fails. If the answer involves a person falling, a heavy object dropping or somebody being trapped, this guide is outside its scope.
Keep guylines visible and away from walking routes. Gather loose tails without creating snagging loops. Do not obstruct an exit or tie to an unknown cable, pipe, fence component or living branch that cannot take the intended light pull without damage.
Weather changes the decision. A light practice tarp should come down before conditions become unsuitable. Use weather observation on a walk for the habit of checking conditions, and route planning for deciding when to stop an outing. Knot knowledge does not make an exposed site appropriate.
Practise inspection as a separate skill
Use the Scouts Scotland practical skills resources to watch a demonstration, then put the instructions aside and tie the knot again. Compare the actual cord path, not just its overall silhouette. A friend can read the steps while you trace each turn with a finger.
Practise identifying the wrong task as well as tying the right knot. Place a reef knot beside two loose guylines and explain why you would not choose it as a loaded joining knot. Put a bowline over an open post and notice that the loop can come off without the knot failing.
On a later day, repeat the exercise with the same cord. If you cannot remember confidently, return to the diagram. There is no advantage in guessing. Skills fade, so include a short review in your regular kit check.

Full image attribution
Coiled rope 03235.jpg — Nevit Dilmen; CC BY-SA 3.0. Resized and converted to WebP; source: https://commons.wikimedia.org/wiki/File:Coiled_rope_03235.jpg
A small repair example
Suppose the drawcord on a storage bag breaks during a campsite visit. Empty the bag onto a clean surface, inspect the channel and choose suitable replacement cord. A fixed loop may help attach a small item, but a knot should not prevent the opening from closing properly or create a loop a child could catch.
If the problem is torn waterproof fabric rather than cord, use the temporary kit repair guide. Pulling a tear together with string can create more holes and concentrate force at the damaged edge. Choosing a different repair method is often the practical skill.
Keep the same approach used in map and compass practice: learn on easy ground where a mistake has a small consequence. Neither a familiar knot name nor a neatly packed repair pouch proves readiness for a difficult environment.
For remote outings, add practical first-aid training to your preparation. Knot practice has a narrow purpose and cannot supply the medical skills needed when somebody is injured.
Before using a light cord attachment
- Confirm that failure cannot injure anyone.
- Inspect cord and every attachment point.
- Choose the knot for the actual task and direction of pull.
- Follow a trusted diagram if any crossing is uncertain.
- Dress and set the knot with visible tails.
- Apply only gentle checking tension for this practice.
- Watch what happens when the line slackens.
- Keep the line visible and clear of exits.
- Recheck after movement or weather changes.
Questions people ask
Can I use these knots for a hammock?
No. A hammock supports a person, so failure can cause injury. Use the manufacturer's suspension system and instructions. This guide deliberately excludes body-supporting applications.
Is paracord always suitable?
No product label removes the need to assess material, condition and task. Cord sold under the same broad name can differ. Use this guide for low-risk practice and do not treat an advertised breaking strength as a safe working load for a knotted system.
Sources
Research checked on 2 November 2026. These sources support the safety points; examples and planning worksheets are original editorial guidance.